Now, none of the future posts are going to be real time posts since I have a TON of DIY projects piling up on my phone that I did long before I started this blog. So, if I forget any important points that you need to help you do this project, I'll be more than happy to go back and add whatever is needed - just let me know!
Let's start with an easy one.
Our home was built in 1962, and I'm pretty sure the interior doors haven't been touched since. They are not pretty, and the house is full of them. They're plain, look like plywood with the odd grain, and just make the entire house look outdated.
We first moved into our home just before Christmas. It was fantastic - we bought ourselves a house for Christmas! But we also bought ourselves a TON of work to go with it. My thoughtful mother brought us a gift and it was one big box. I looked inside and YAY! Bronze doorknobs for the entire house. Love. So, in my excitement, I completely forgot to take a photo of the "before" knobs, but I'm sure you all can picture them. Brass, rusted, squared edges, with nicks and scratches across the face. It's not really something you notice until you notice it. Then, you don't even want to use them because they're just so ugly. Or at least that's how my OCD mind works. Once I notice it, I MUST find a way to fix it or else it will no longer exist to me and will probably end up in the Goodwill box whether they want it or not.
So, here they are! Our beautiful new bronze doorknobs surrounded by an unattractive, outdated door.
Looking at these doors eventually drove me mad. So I started looking to buying new interior doors. At $100 a piece, that idea was immediately out the window. On to the DIY forums!
First, I found this ADORABLE post on Little Green Notebook for a bright yellow door.
Too cute, right? But that look just wasn't right for our small, ranch home. We've decorated with a transitional style that lies somewhere between modern and traditional cottage, and our home is already filled with color. So colored doors were out.
Next, I came across the black-painted doors at A Well Dressed Home, and I was in LOVE.
So I pulled out the sketch pad and drew up a plan for my own door:
I started with what looked normal for the bottom section of the door. 10" above the ground looked about right. Then for the side measurement, I went to the knob and measured to just inside of it landing on 4.5". Then I took a pencil and just started drawing on the door where I thought the molding should go, made a mock version on the Mixture app on my phone to take to the store in case I needed to glance at it, added all of the measurements, and off to Home Depot I go!
I found this fantastic little molding and debated for a moment whether I should get something larger. I decided I'd go with the smallest molding because it would look more properly scaled on the thin Entry Closet door that I was working on. I also made sure to get a shape that was rounded on both ends so that the molding would "flow" across the door per se. Here's what I ended up with:
I grabbed my little miter box, started measuring, and began cutting my pieces at 45 degree angles. I then wiped down the door with a lightly dampened paper towel and used Gorilla Wood Glue to glue the molding pieces along my drawn-on lines on the door.
Over in the paint section, I got samples of the two colors that jumped out at me first, and slapped them each on a section of the door to see which I preferred.
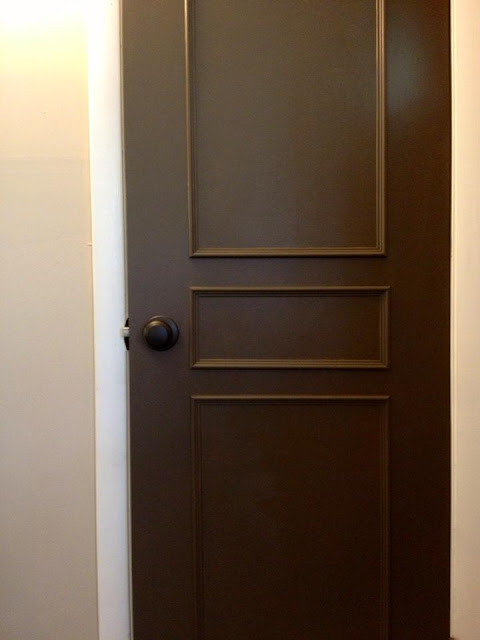
Looking around the room, I thought the lighter color would blend too much with the Behr Castle Path taupe that was already on the walls. So, I went with Valspar Italian Leather to give the doors some contrast and to create a more traditional look. I let the molding dry overnight so I wouldn't mess with the glue while painting, and then I used a paintbrush for the entire door.
I absolutely love the way it turned out. The door now looks like solid wood and the deep contrasting chocolate-type brown is just fabulous and really pulls in all of the bronze accents throughout the house.


